Wednesday, October 17, 2012

Birthday gift

It's my party and I'll skydive if I want to, skydive if I want to ;)

For my birthday gift this year the hubby decided to take me skydiving!! On our mini vacay to Pigeon Forge TN we went to an indoor skydiving place and I absolutely loved it so it and was definitely ready to take the real jump.

We went to a place in Cedartown GA called Skydive GA and it was an amazing experience!

On the plane ride up, I was a bit nervous...

 
The hubby, on the other hand, seemed calm as a cucumber
 
 
Once the plane reaches the right height, the instructor stands up with you attached to his chest and jumps, there is no turning back LOL


The hubby


Phew. Wind blown but safe and sound back on the ground :)
 
 
It was so much fun and such a great experience. We jumped from just under 15,000 ft and we chose this place to jump from so we could see the Atlanta airport arrival traffic pattern (He is/I was an Air Traffic Controller, we live for planes LOL)
 
Not sure how the hubby is going to top this next year ;)


Tuesday, October 16, 2012

Framimg our master bathroom builder grade mirrors

Frame those boring mirrors with no 45 degree angle cutting required ;)

 
I think that this quick and easy fix made a huge impact in the master bathroom and I'm totally digging it!!
 
Supplies I used:
 
Fluted trim
Miter box and saw (purchased at Home Depot for about $12)
measuring tape
 

Square rosettes

Liquid Nails Heavy Duty adhesive
First step is to apply the Liquid Nails to the square rosettes like so:
Tip: Make sure to keep the adhesive away from the edges or you will see it reflected back on the mirror.

Then set square pieces in each corner held in place with tape

Let that set for a few minutes while you measure the space between the square pieces to know how long to cut the fluted pieces
After you have all your pieces cut
Apply the Liquid Nails to your cut pieces (making sure to stay away from the edges again) and adhere to the mirror and hold in place with painters tape until dry
Once it's all dry, removed the tape and caulk all seams
Doesn't it look so pretty with the new painted countertops and the ORB spray painted fixtures?
Makes actually tolerating liking the white laminate cabinets a litte easier ;)
Thanks for letting me share another one of my home projects
And because I love seeing Before and Afters I'll share where it all started
 
 
 Linking up to

Sunday, October 14, 2012

Painted faux granite countertops! Master Bathroom transformation continues

I Painted my countertops and lived to tell the tale ;)

 
Well first a quick apology for the LONG delay from the last post to this one! I had grand plans to blog while on our relaxing TN cabin in the mountains vacation,,,I did not however take into account that my computer wouldn't hold the connection to their internet long enough to even check facebook!!

I have seen quite a few painted countertop tutorials online and decided to try to tackle this project in our master bathroom.

Our countertops started out as basic builder sink/counter faux marble that seems to be ever so popular in these parts.
 
But ended up looking like this:
 
 
No really!! That's my actual painted counter top


I started by covering them with Kilz primer

 
This wasn't too scary because it didn't change the look all that much.

 
And then came the scary
 
You may want to cover your eyes if you frighten easily
 
No, really, cover up them eyes, maybe just peek through a few..
 
 
Using a sea sponge I dabbed on my first color, at this point I almost cried.
 
I thought I royally messed up trying this.
 
They looked absolutely horrid.
 
 
Hey I warned you :)
 
It's going to get worst before it gets better...
 
 
Now I know I warned you at the beginning, that was really just a courtesy to prepare you for the next picture so if you get even a wee bit squeamish at the sight of absolute ugliness, please scroll fast LOL


Uh, yeah, not much I can say, it was U-G-L-Y
 
I had to force the hubby to stay out for fear he'd run away and never return.
 
But I was not about to let these countertops beat me, oh no!! I was going to forge on and just keep on adding colors.
 
It really couldn't get worst
 
Right? I mean RIGHT?
 
 
Alas, my heartrate was starting to come down.
 
Adding the metallic paint seemed to help calm it down, but still wasn't 'there' yet
 
 
Went over with the lightest color to tone it all down
 
That's what I'm talking about!!
 
 
The hubby's side
 
 
Now to topcoat.
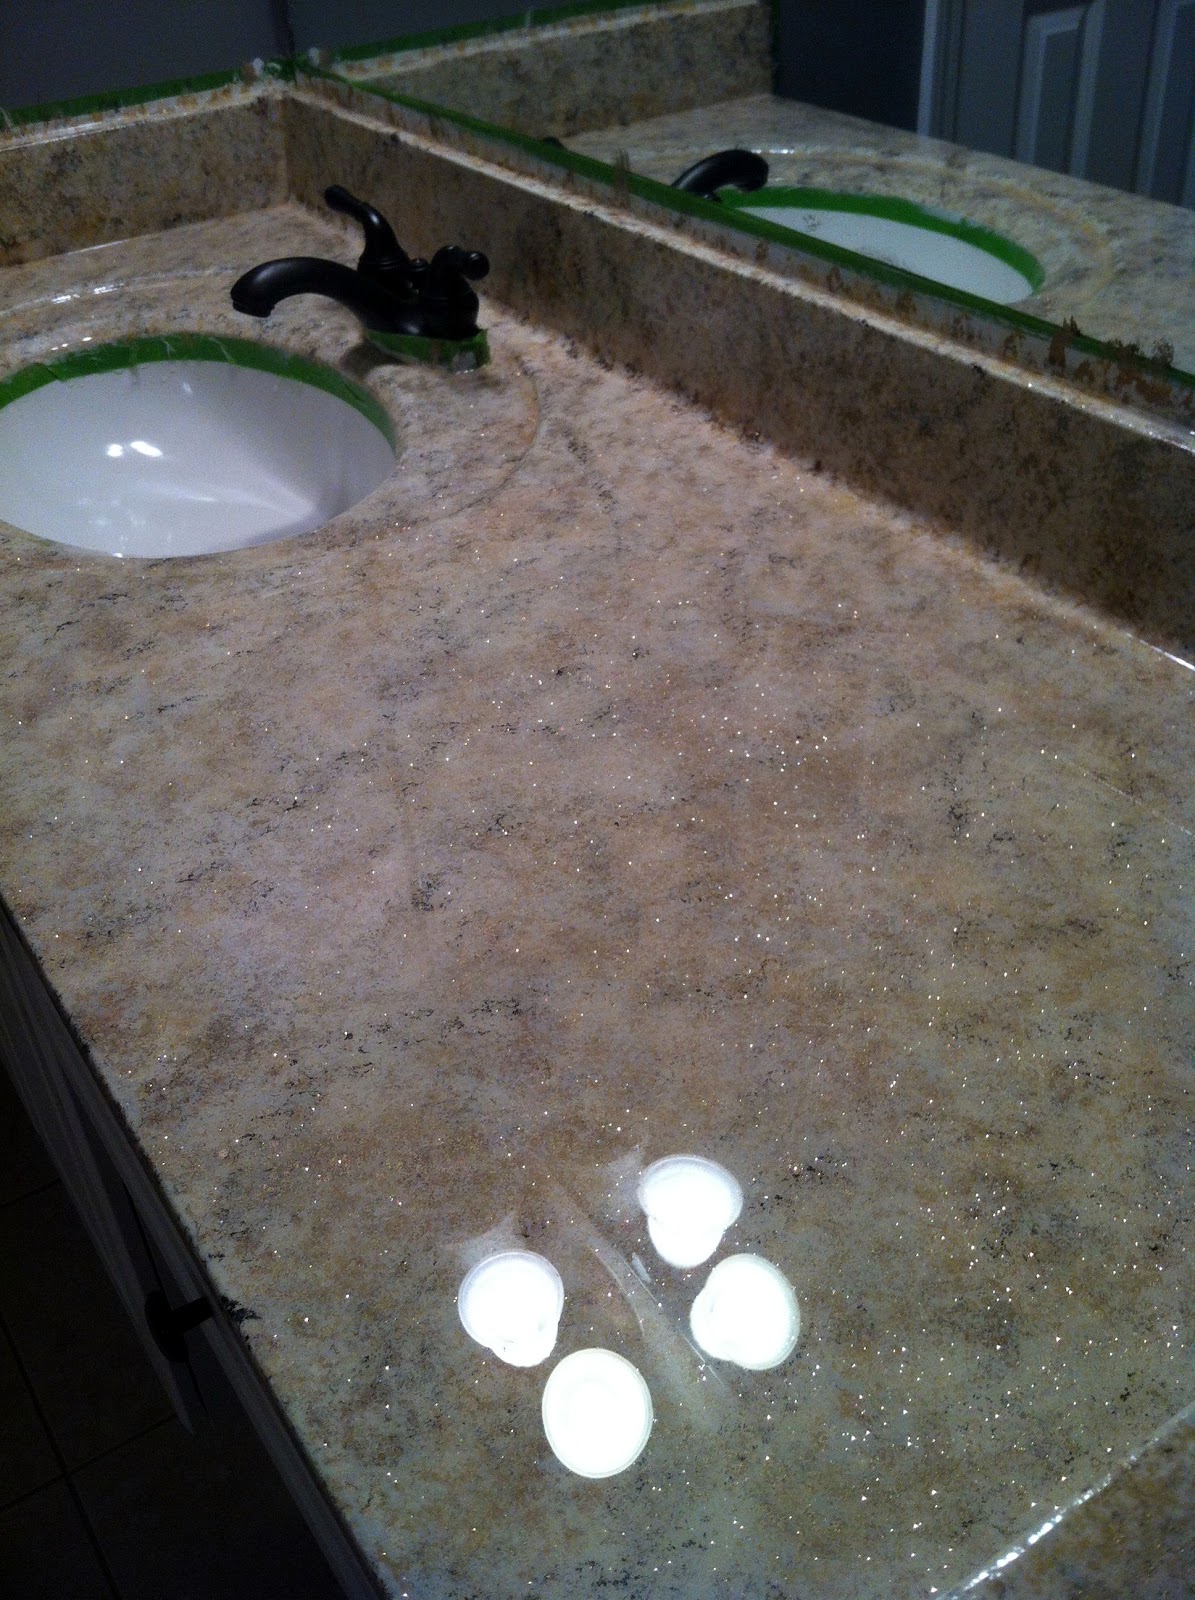
I used Envirotex Lite
Purchased at Michaels with 50% off coupons (used 2 boxes)
 
It's sooooo shiny!!!
And you can see I may have overdone it on the sparkles. Not so obvious in real life.
Thank goodness ;)
 
 
Here you can see how I covered up the cabinets to protect from the topcoat, not the easiest material to work with but definitely do-able even for a novice like me.
 
 
A close up of the 'granite' look
 
 
Not bad for about 36 bucks of material eh?
 
I'll admit the first, second and even third coat I sponged on had me a bit terrifed, I thought I had made a HUGE mistake taking this on but the end result is totally worth those gray hairs I grew freaking out stressing about it ;)
 
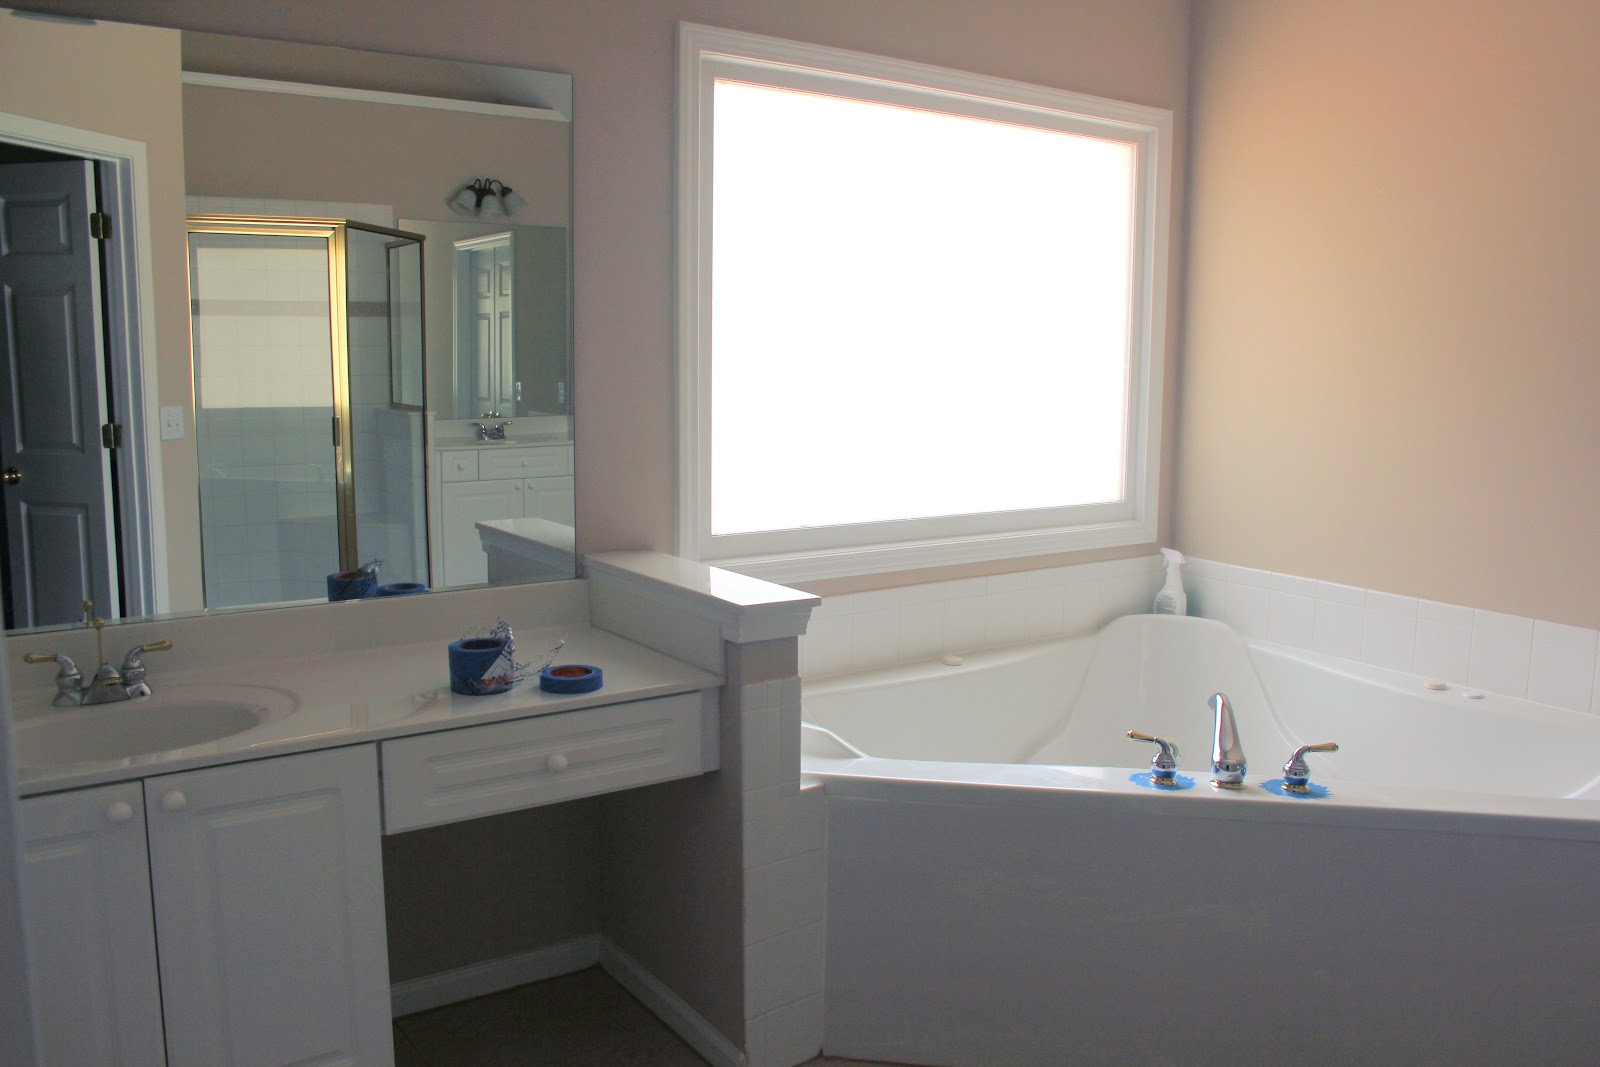
A quick look at what it looked like when we moved in

 
And after painting...
 
 
Bought new cabinet hardware and that made a huge impact as well for low cost.


I love how it turned out and can't wait to share the next project I tackled in here.
 
Framing the basic builder mirrors with no miter cuts!!
 
Linking up to some great parties:
 
Chic on a Shoestring Decorating
 
DIY Show Off
Skip To My Lou

Sunday, September 23, 2012

From Brassy to Classy-Transforming our Master bath with paint

Painting the Gold shower enclosure and faucets kicks off the master bathroom renovation!!


One of the major renovations we have going on right now is almost finished!!

I'm going to pretend that we don't have 3 other major projects going on and focus only on the bathroom.

Why?

Because I'm feeling quite overwhelmed by the labor intensive work ahead on the stairs, kitchen cabinet makeover and finishing of our basement.

And because we're leaving for a cabin getaway in the smoky mountains so no progress on the house will be happening. Might as well revel in the projects that have been completed instead of worrying about the projects yet to be finished.

Lets get started by taking a peek at the bathroom before:

Shower and His side:

Tub and Her Side


After a ton of taping and covering and a few cans of Oil Rubbed Bronze spray paint.

Ta-Da!!


Amazing what a little elbow grease and spray paint can do isn't it?? I'm in love!! Can't wait to show you the next transformation that I accomplished with  paint on those countertops, yep, I painted them a  faux granite! I'll share those details tomorrow!!

A little side by side action to fully see the impact!!


I followed Kristi at Addicted to Decorating's tutorial to the letter and LOVE LOVE LOVE the results and highly suggest if you are going to attempt this project you follow her lead :)

Addicted to decorating Painting faucets and shower enclosure tutorial

This project was certainly a labor of love and took FOREVER. The hardest part I encountered was removing all of the caulk around the shower enclosure. The tile soap dish is the only casualty so far, the paint peeled right off after a wash cloth was left to dry on it.

This project cost about $80 but made a huge impact

Spray Paint: $7.96/can- used 4 cans
Automotive Primer: $6.99- used 2 cans
Tape: ~$5
Brown Paper roll: ~$12
Plastic sheeting: ~$8
Sand Paper: ~$3
Steel wool: ~$5
*the last 5 item costs are appoximates

More to share tomorrow!!

-Danielle

Tuesday, September 18, 2012

IKEA Tarva turned Knock Off Anthro Ordinal Dresser

Want to see how I turned an Ikea Tarva dresser into Anthro's Ordinal dresser??


As I continue to work on the stair transformation I'm going to share another knock off idea I have sitting in my entryway.

The entryway table I shared a few days ago was purchased to live right inside the front door but I may or may not have went shopping and forgot (err never measured) the space between the wall and column, the table was too long, so it was moved to sit beside the staircase.

As I sat in the school pick up line one afternoon killing time, checking emails I clicked on the email from Anthro and was clicking around to see what they had to offer. I couldn't believe the price they wanted for the little 3 drawer Ordinal dresser but that's not unusual for me, I'm cheap frugal and gasp at most major retailers pricing. However I couldn't help thinking about those cute little numbered drawers.

 
Enter pinterest and a quick search of DIY anthro dresser.
 
Voila!
 
I had found the most amazing makeover from East Coast Creative Blog (formerly The Real Housewives of Bucks County)


Well I wasn't lucky enough to have an old dresser in the garage and I needed something that would fit in the space inside the front door.
 
So AFTER measuring the area I wanted to fill (I'm learning, I'm learning!!) and a quick trip down to IKEA I came home with the perfect dresser to makeover.
 
I love that the Tarva dresser is 3 drawers and unfinished. The $79 dollar price tag was so much better than Anthro's $998 price, SCORE!!
 
Plus, it fit! Thank you handy measuring device ;)


Gave it a quick coat of stain with Minwax Special Walnut
 
 
I traced out a stencil I had on hand and then hand-painted each number on.
 
 
Waited for the paint to dry and gave each number a super light sanding just to tone down the black paint.
 
 
And now she's all ready to stand her ground at the front door.
 
 
This area is next on the Holiday decorating hit list so you'll be seeing it again soon and hopefully in better light! Oh and yep, that's where the owl I stole borrowed for the Halloween display came from.
 
Thanks for stopping by!
 
-Danielle